Part V: Users, roles and sessions
Let’s list out the user management features required in our blog app:
- User registration, login, logout, user-info etc.
- There are two classes of visitors, logged in users and anonymous users. We need roles to model this.
Before we implement the functionality needed for our blog app, let’s understand what the Hasura platform offers.
The Hasura auth workflow
When a user signs up using the auth microservice’s /signup endpoint, they are assigned a unique identity i.e. a
unique integer called hasura_id. This unique integer can be used to link the user to the rest of the data in the
database. Also, a role called user is assigned to every newly logged-in user. All users on a Hasura platform are
identified with their hasura_id and their role.
Whenever a new user signs up or an existing user logs in, a session token called auth_token is generated that
represents the user session. This auth_token is mapped with the user’s information and stored in the session_store.
Note
Hasura’s auth microservice comes with a default user called ‘admin’ with hasura_id = 1 and roles admin
and user.
A bit about sessions
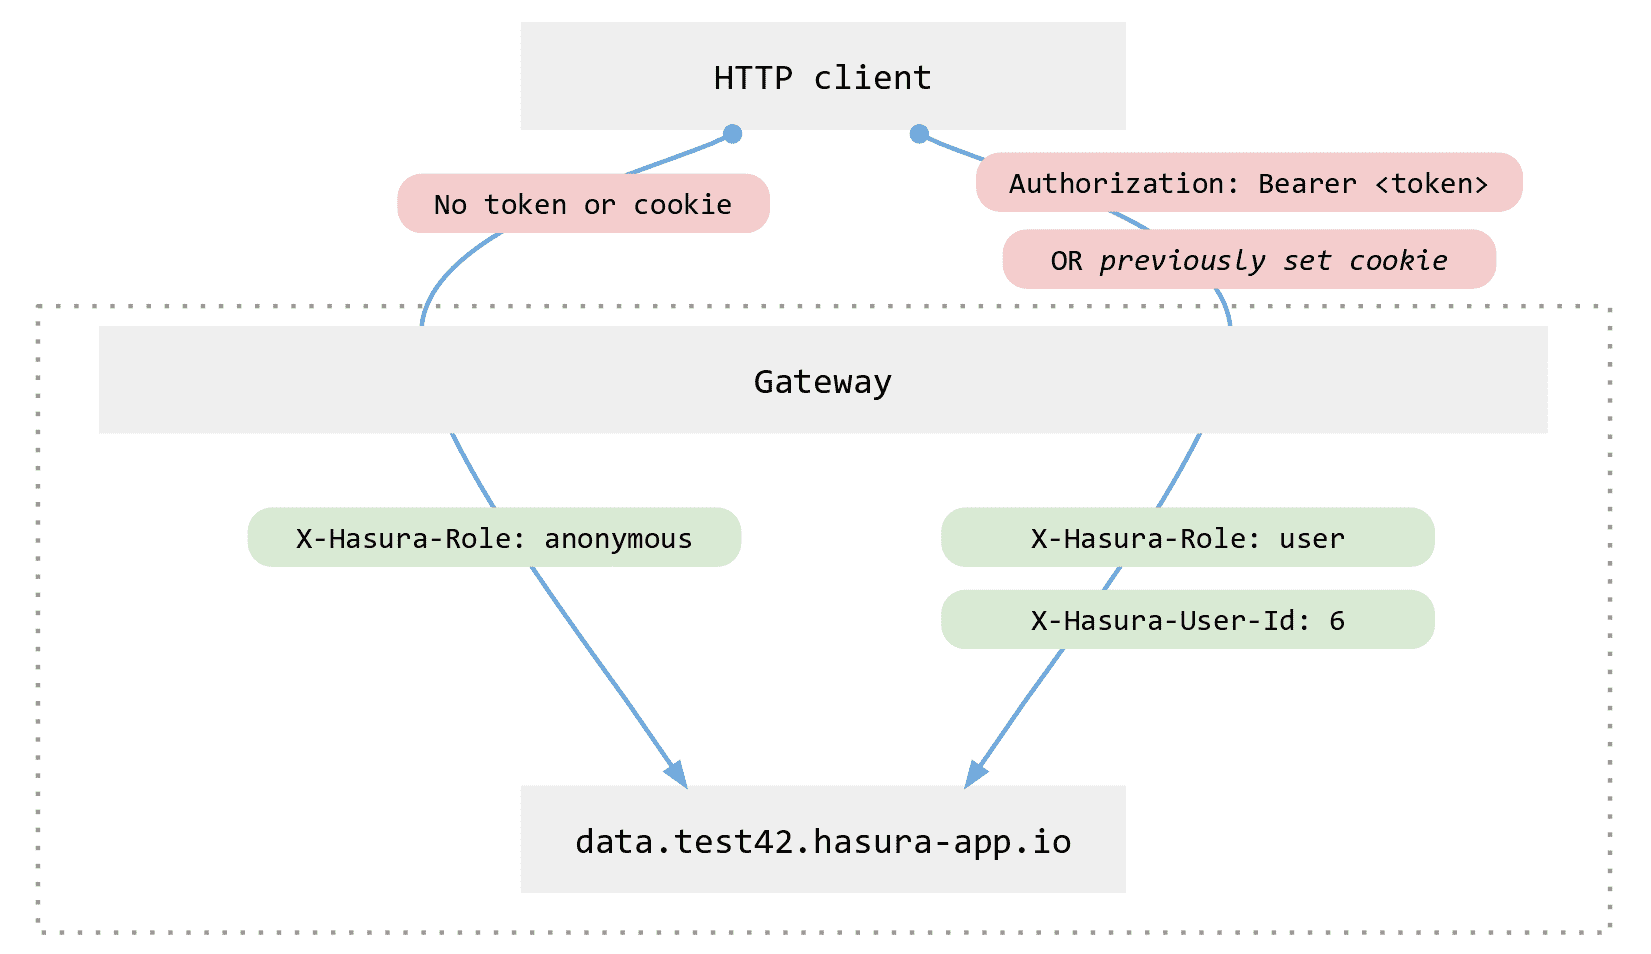
Every microservice benefits from having the user’s information (id and roles) with each request. In the Hasura platform, every request goes through the Hasura API gateway. So, the gateway integrates with the session store to act as a session middleware for all microservices.
When the gateway receives a request, it looks for a session token in the Bearer token of Authorization header or
in the cookie. It then retrieves the id and roles of the user attached to this session token from the session store.
This information is sent as X-Hasura-User-Id and X-Hasura-Role headers to the upstream microservice.
If the X-Hasura-Role header is passed with the request, its value is passed to the upstream service if the user has
that particular role or else the request is rejected with a 403 Forbidden response.
When the session token is absent from both header and cookie, the gateway considers it as an anonymous request and adds the
header X-Hasura-Role: anonymous. The X-Hasura-User-Id header is not set in this case.
For example, the image below demonstrates the gateway’s behaviour when two different kinds of incoming requests are made
to data.test42.hasura-app.io from an HTTP client:
Before you begin: Open the API console
Run:
# Run this command inside your project directory
$ hasura api-console
This will open up the API console and show you the API explorer page which you can use to understand the APIs
provided by the Auth microservice.
The “auth” microservice
The auth microservice is a part of every Hasura cluster. It has extensive APIs to manage users, roles and integrates
with various social login providers.
Let’s explore the endpoints that we are interested in to build our blog app using the API console:
Register a user
Click on
Signupfrom the Username Password dropdown underAuthin the left panel. Enter the username and password and hitSend.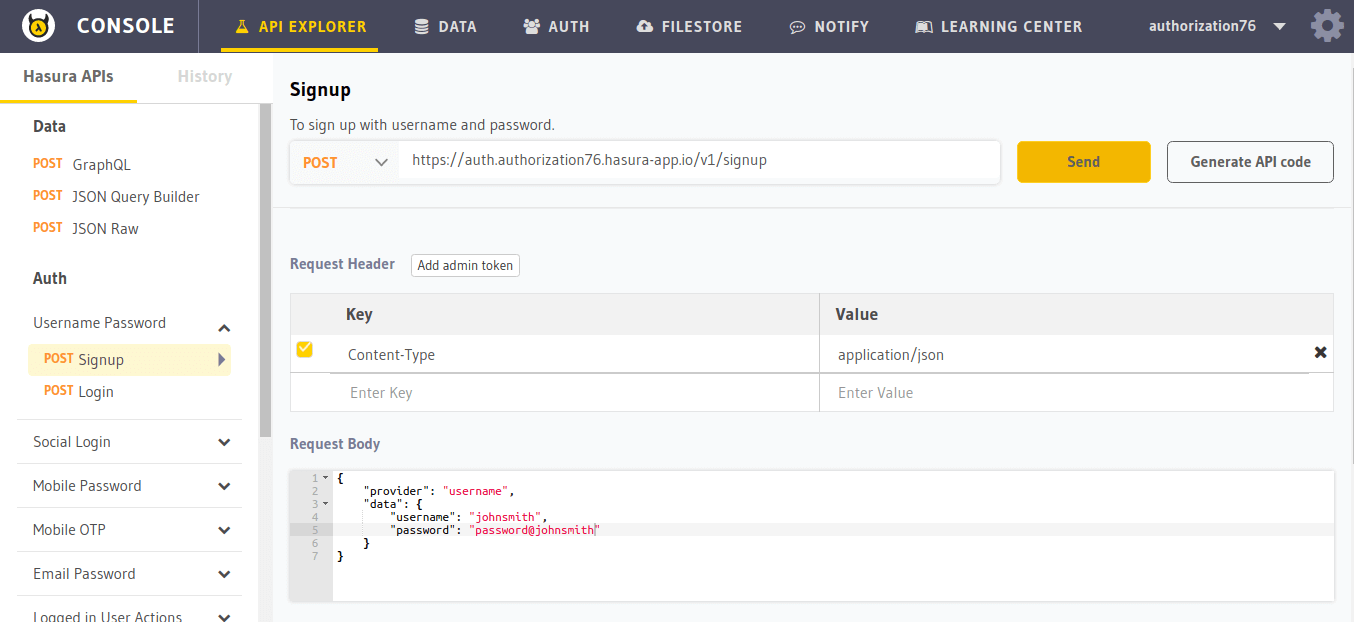
The response will be as follows:
HTTP/1.1 200 OK
Content-Type: application/json

{
    "auth_token": "41ddk3k12kdf332397c526e58c24e74b63444baa5770929b",
    "hasura_id": 2,
    "hasura_roles": [
       "user"
    ]
}
Every user created with the
/signupendpoint is assigned the roleuser.Login
Let’s try to login with the username and password that we just registered with. Select
Loginin the left panel.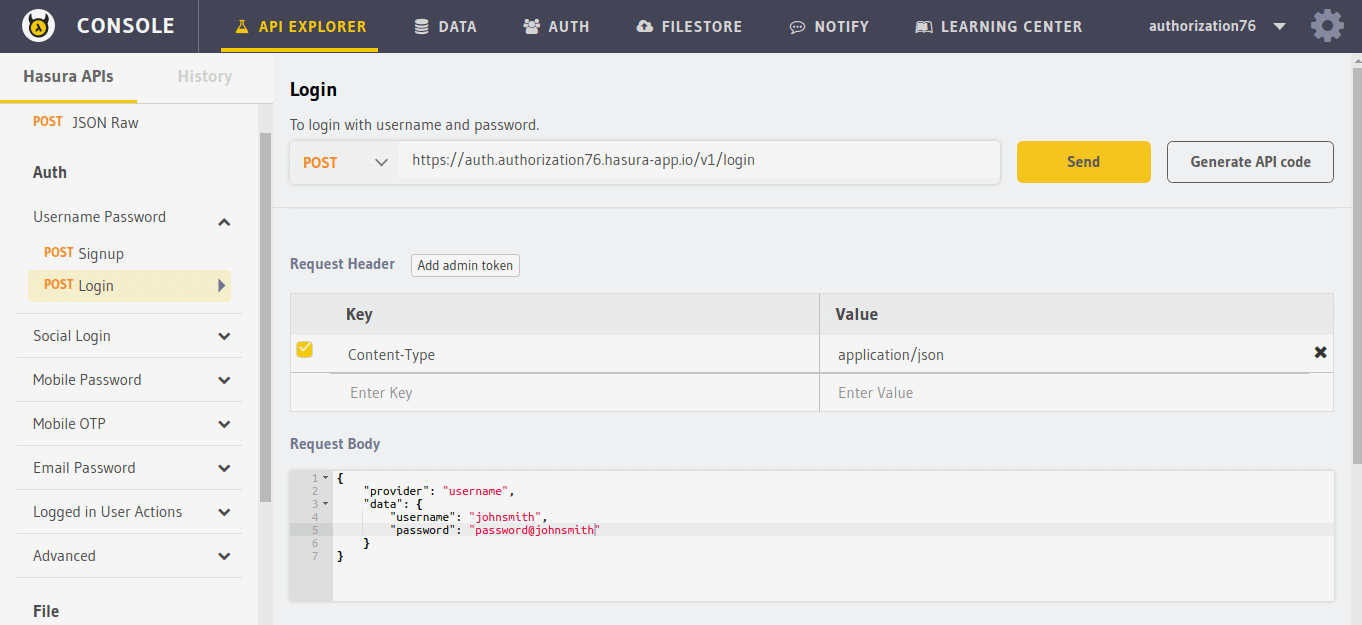
The response will be as follows:
HTTP/1.1 200 OK
Content-Type: application/json
Set-Cookie: dinoisses=14e3e76d5bac289f299da3b1e5f86814b401464a99f28e67; Domain=.authorization76.hasura-app.io:01:34 GMT; httponly; Max-Age=1814400; Path=/

{
    "auth_token": "14e3e76d5bac289f299da3b1e5f86814b401464a99f28e67",
    "hasura_id": 2,
    "hasura_roles": [
       "user"
    ]
}
When a user logs in, a new session token is created for the user. It is set as cookie and also returned in
auth_tokenof the response. The token and the associated user’s information is stored in the session store.Copy this
auth_token.User info
You will often need to get user information of the logged in user. Lets try to get the user information of the user that we just registered and logged in. This API can be used only by a logged-in user. Select
User Informationunder Logged in User Actions in the left panel.Copy the
auth_tokenfrom the login response and paste it in theAuthorizationheader as shown in the image below.If the
Authorizationheader is absent, the session token is read from the cookie.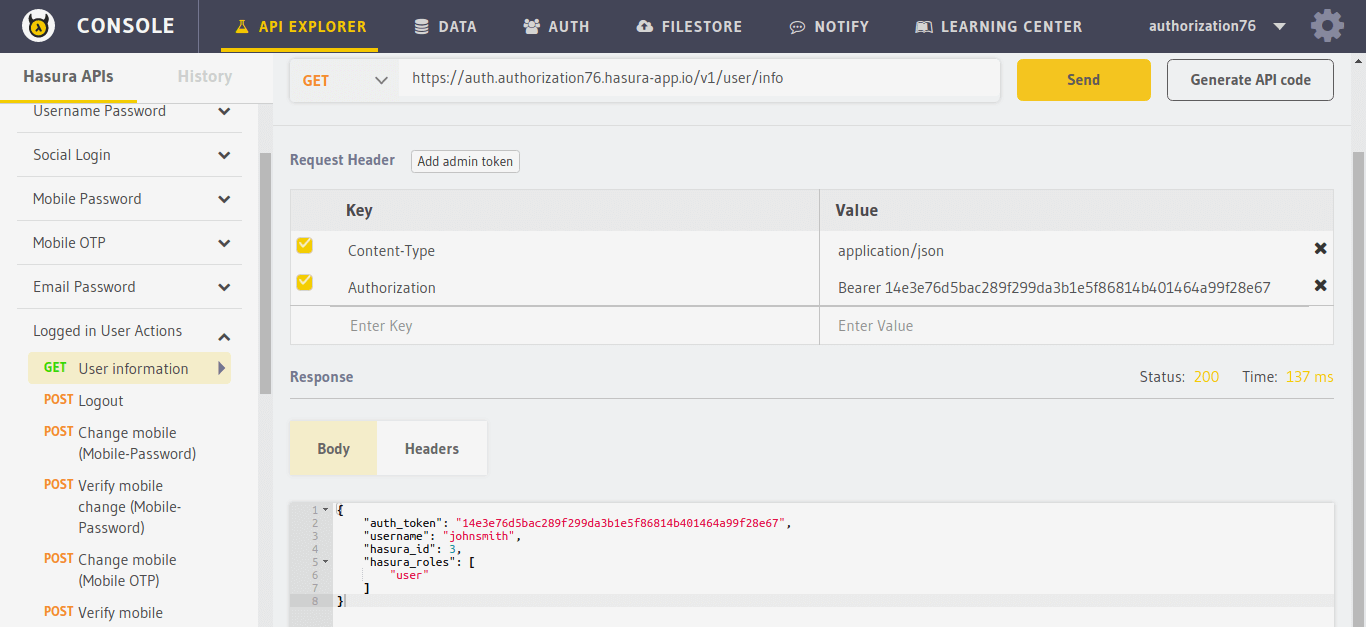
Now let’s get the default user
admin’s information. The admin token is in fact the useradmin’s session token. Let’s use the admin token in theAuthorizationheader.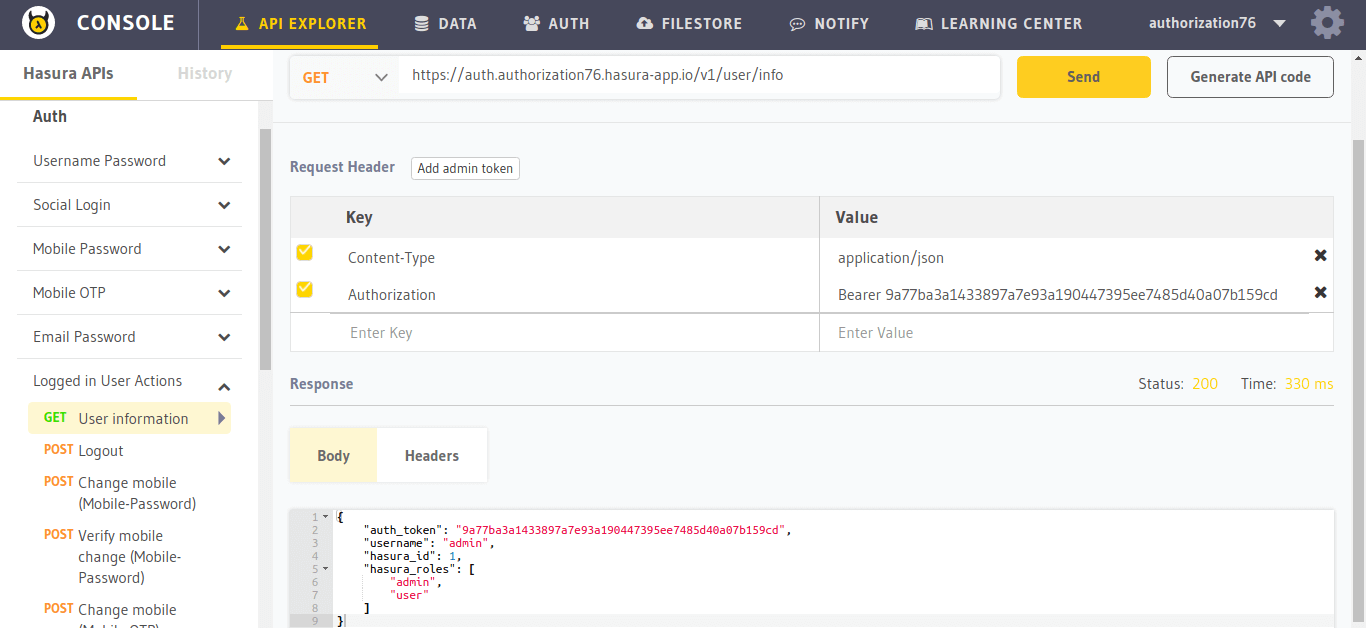
You can see that the user
adminhas anadminrole in addition to theuserrole.Logout
To logout the logged in user, use the
/user/logoutendpoint. Select theLogoutAPI from the Logged in User Actions dropdown in the left panel.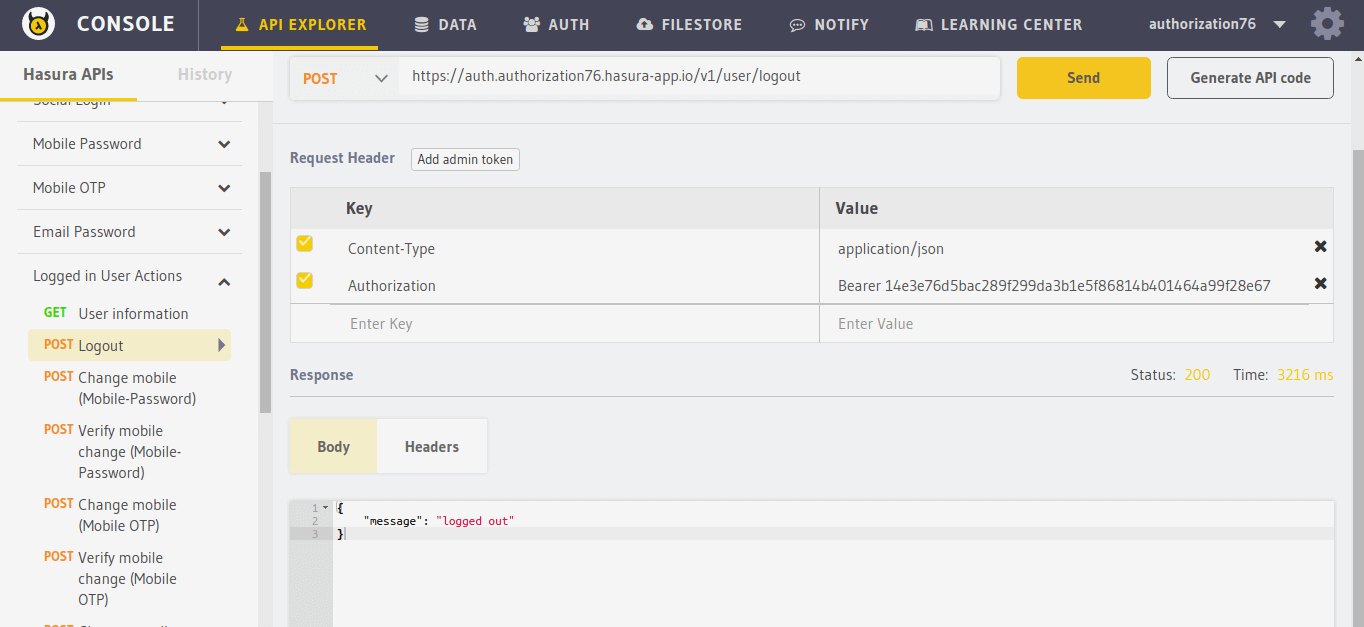
When the user logs out, the session token is deleted from the session store and the cookie is set to expire.
HTTP/1.1 200 OK
Content-Type: application/json
Set-Cookie: dinoisses=; Domain=.authorization76.hasura-app.io; expires=Thu, 01-Jan-1970 00:00:00 GMT; Max-Age=0; Path=/

{
    "message": "Logged out"
}
Generate API code
The API console has a code generator that can automatically generate code to access all the above APIs (and more)
in the most popular languages. To generate API code, click on the Generate API Code button next to the Send button
and choose your desired language.
Other login providers
You can also perform auth with Mobile, Email, Google and several more providers. Read more here.
Next: Create your data models
Next, head to Part VI: Data modelling for the blog app.