- Hasura Platform
- Getting started
- Installing the Hasura CLI
- The complete tutorial
- Part I: Create a Hasura project
- Part II: Create a Hasura cluster
- Part III: Explore the Hasura cluster
- Part IV: Build a blog app engine
- Part V: Users, roles and sessions
- Part VI: Data modelling for the blog app
- Part VII: Explore the data APIs
- Part VIII: Adding relationships to data models
- Part IX: Permissions & access control on data models
- Part X: Aggregations, views and custom relationships
- Part XI: Custom code and microservices
- Part XII: Using the Auth UI Kit
- GraphQL tutorial
- Hasura project
- Hasura cluster
- Project microservices
- API Console
- Auth
- Data (GraphQL/JSON APIs)
- Filestore
- Notify (Sending emails/SMS)
- Postgres
- API gateway
- Hasura Hub
- Hasura CLI reference
- Hasura API reference
- Guides
- Installing Hasura on a Kubernetes Cluster
- Hasura architecture
- Billing for Hasura
- Moving to v0.16 from v0.15
- Moving to v0.15 from older versions
Part IX: Permissions & access control on data models
By default, the data APIs can only be accessed by users with the admin role. However, in
our blog app, users will not have the admin role assigned. So, we need to allow access to the data APIs for
roles other than admin. This is handled by the permission layer of the data microservice,
which lets you define row level and column level access control policies for all the roles and for different query types.
In our blog app, what roles do we have other than admin?
userfor logged in usersanonymousfor users who haven’t logged in.
We need to define permissions on all the tables that we have created so far for the user and anonymous roles.
Let’s look at the access conditions we should set up for our tables:
| Role | Query type | Columns | Rows |
|---|---|---|---|
| anonymous | select | all columns | all rows |
| anonymous | insert | – | not allowed |
| anonymous | update | none | not allowed |
| anonymous | delete | – | not allowed |
| user | select | all columns | all rows |
| user | insert | – | if user is the author |
| user | update | title, content | if user is the author |
| user | delete | – | if user is the author |
| Role | Query type | Columns | Rows |
|---|---|---|---|
| anonymous | select | all columns | all rows |
| anonymous | insert | – | not allowed |
| anonymous | update | none | not allowed |
| anonymous | delete | – | not allowed |
| user | select | all columns | all rows |
| user | insert | – | their own row |
| user | update | name | their own row |
| user | delete | – | their own row |
| Role | Query type | Columns | Rows |
|---|---|---|---|
| anonymous | select | all columns | all rows |
| anonymous | insert | – | not allowed |
| anonymous | update | none | not allowed |
| anonymous | delete | – | not allowed |
| user | select | all columns | all rows |
| user | insert | – | if user is giving the like |
| user | update | none | not allowed |
| user | delete | – | if user gave the like |
| Role | Query type | Columns | Rows |
|---|---|---|---|
| anonymous | select | all columns | all rows |
| anonymous | insert | – | not allowed |
| anonymous | update | none | not allowed |
| anonymous | delete | – | not allowed |
| user | select | all columns | all rows |
| user | insert | – | if user is writing the comment |
| user | update | comment | if user wrote the comment |
| user | delete | – | if user wrote the comment or is author of the article |
To summarize:
anonymousrole users can select (read) all the data.anonymousrole users cannot modify (insert/delete/update) any data.userrole users can select (read) all the data.userrole users can insert/delete “their own data” and update only certain fields once inserted.
To define “their own data”, we can describe a condition using the value of the X-Hasura-User-Id header passed to
the data microservice by the API gateway (as explained in the user, roles & sessions section).
The following are the conditions we will use while setting up the row level permissions described above:
| Table | Definition | Condition | Representation |
|---|---|---|---|
| All tables | allow all rows | Without any checks | {}
|
| article | user is author | user-id is equal to author_id |
{
  "author_id": {
    "$eq": "X-Hasura-User-Id"
  }
}
|
| author | user’s own row | user-id is equal to id |
{
  "id": {
    "$eq": "X-Hasura-User-Id"
  }
}
|
| like | user gave like | user-id is equal to user_id |
{
  "user_id": {
    "$eq": "X-Hasura-User-Id"
  }
}
|
| comment | user wrote comment | user-id is equal to user_id |
{
  "user_id": {
    "$eq": "X-Hasura-User-Id"
  }
}
|
| comment | user wrote comment or is author of article | user-id is equal to user_id or user-id is equal to article's author_id (this requires a relationship
called article to be defined first) |
{
  "$or": [
    {
      "user_id": {
        "$eq": "X-Hasura-User-Id"
      }
    },
    {
      "article": {
        "author_id": {
          "$eq": "X-Hasura-User-Id"
        }
      }
    }
  ]
}
|
Defining permissions:
We can use the API console UI to add permissions for our tables. Head to Data -> [table-name] -> Permissions to
see/modify the permissions on the table.
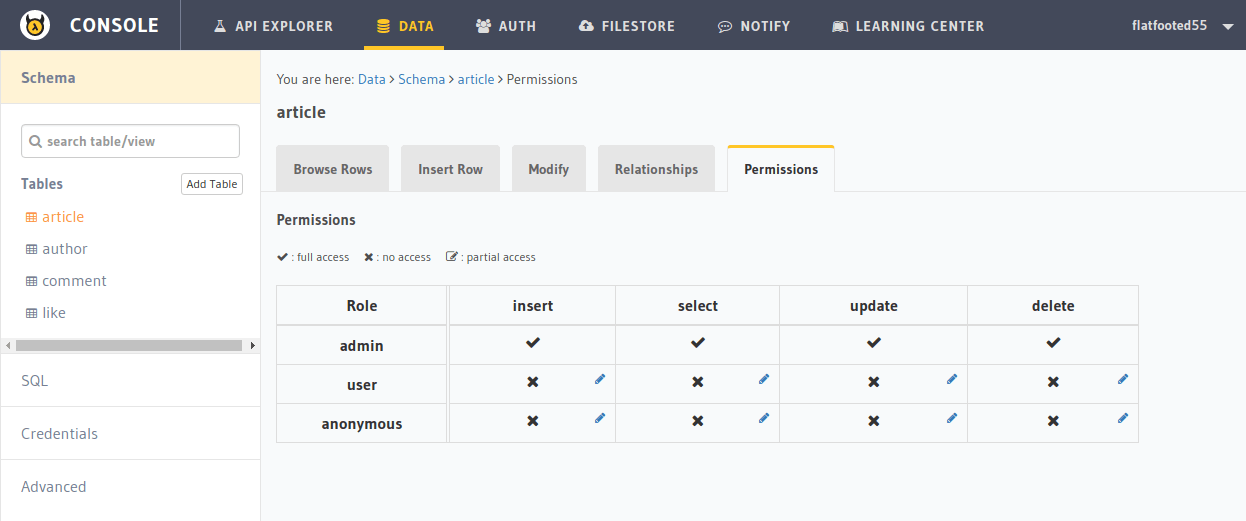
For example, let’s set the update permissions for the user role on the article table:
The Permissions tab of the article table should look like this:
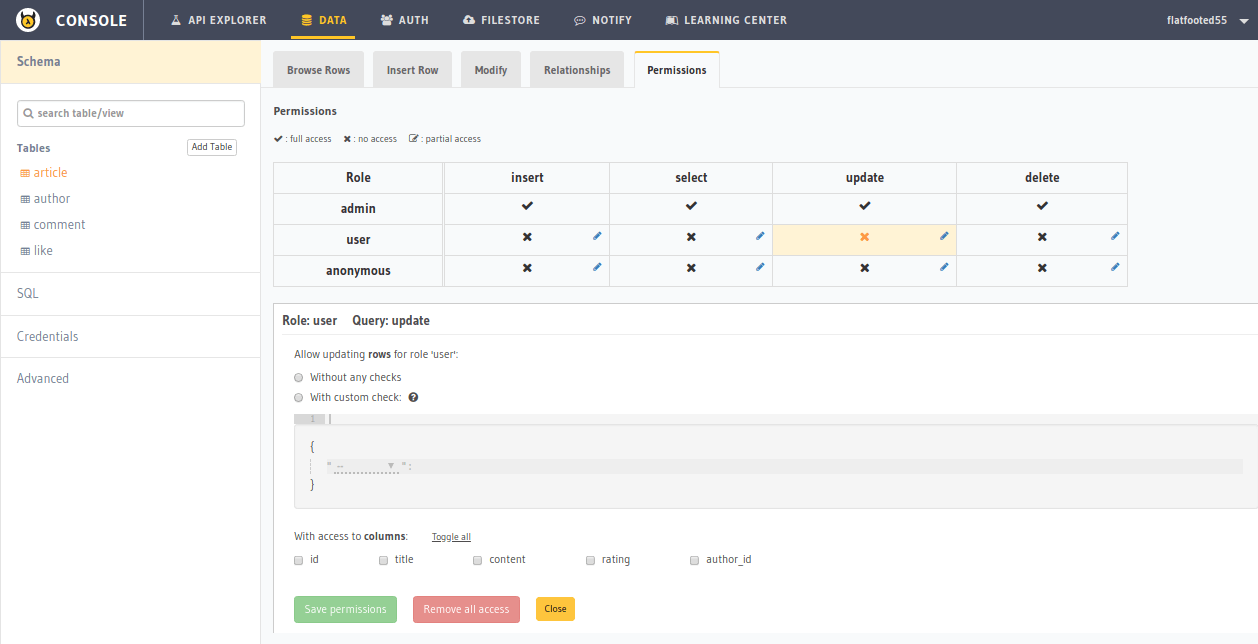
Click on the Edit icon next to the user/update cell. It should open up an edit section like this:
Now, set the permissions as described above. It should eventually look like this:
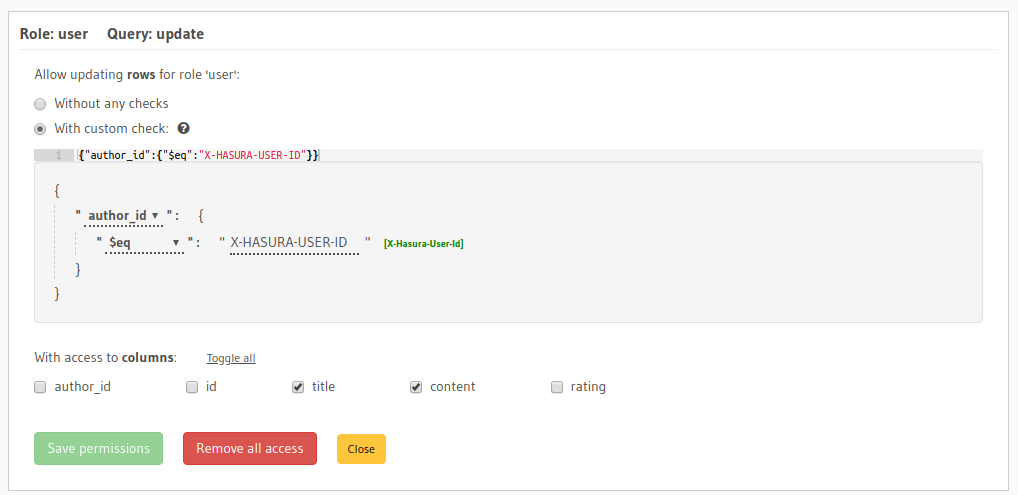
Hit Save permissions to save our changes.
Similary, set permissions for all the cases we have described above.
Next: Add aggregations and views
Next, head to Part X: Aggregations, views and custom relationships.
