- Hasura Platform
- Getting started
- Installing the Hasura CLI
- The complete tutorial
- GraphQL tutorial
- Hasura project
- Hasura cluster
- Project microservices
- API Console
- Auth
- Data (GraphQL/JSON APIs)
- Filestore
- Notify (Sending emails/SMS)
- Postgres
- API gateway
- Hasura Hub
- Hasura CLI reference
- Hasura API reference
- Guides
- Installing Hasura on a Kubernetes Cluster
- Hasura architecture
- Billing for Hasura
- Moving to v0.16 from v0.15
- Moving to v0.15 from older versions
Part IV: Add relationships
Exploiting relationships in your data
The data microservice allows you to set up different relationships between data, which enables you to make more complex and interesting queries to fetch data.
For example:
// Normal output of select query
[{
   "id": 1,
   "title": "My first article",
   "content": "Lots of content...",
   "author_id": 3
}]

// Output of select query using a relationship
[{
   "id": 1,
   "title": "My first article",
   "content": "Lots of content...",
   "author": {
      "name": "Ramu"
      "id": 3
   }
}]
Let’s look at the different relationships we have in our data models:
author:- has multiple
articleswritten by them
- has multiple
article:- has one
author - has multiple
comments - has multiple
likes
- has one
comment:- has one
articleon which it was posted
- has one
like:- has one
articlethat has been liked
- has one
These relationships can be captured by foreign key constraints. If we were to represent rows of our table in JSON, as
objects, then we can express these relationships as nested arrays or objects. E.g.: Every author object can have
a key called articles which is an array of article objects. Similarly, every article object can have a key
called author which is an author object.
Let’s see how these relationships are established:
| Table | Relationship | Type | Established by |
|---|---|---|---|
| author | articles | array | article::author_id -> author::id |
| article | author | object | article::author_id -> author::id |
| article | comments | array | comment::article_id -> article::id |
| article | likes | array | like::article_id -> article::id |
| comment | article | object | comment::article_id -> article::id |
| like | article | object | like::article_id -> article::id |
Creating relationships
You can create relationships for tables via the API console.
By default the object relationship author for the article table has already been created. Click on the
article table and navigate to the Relationships tab.
You’ll see an entry in object relationships for author_id -> author::id:
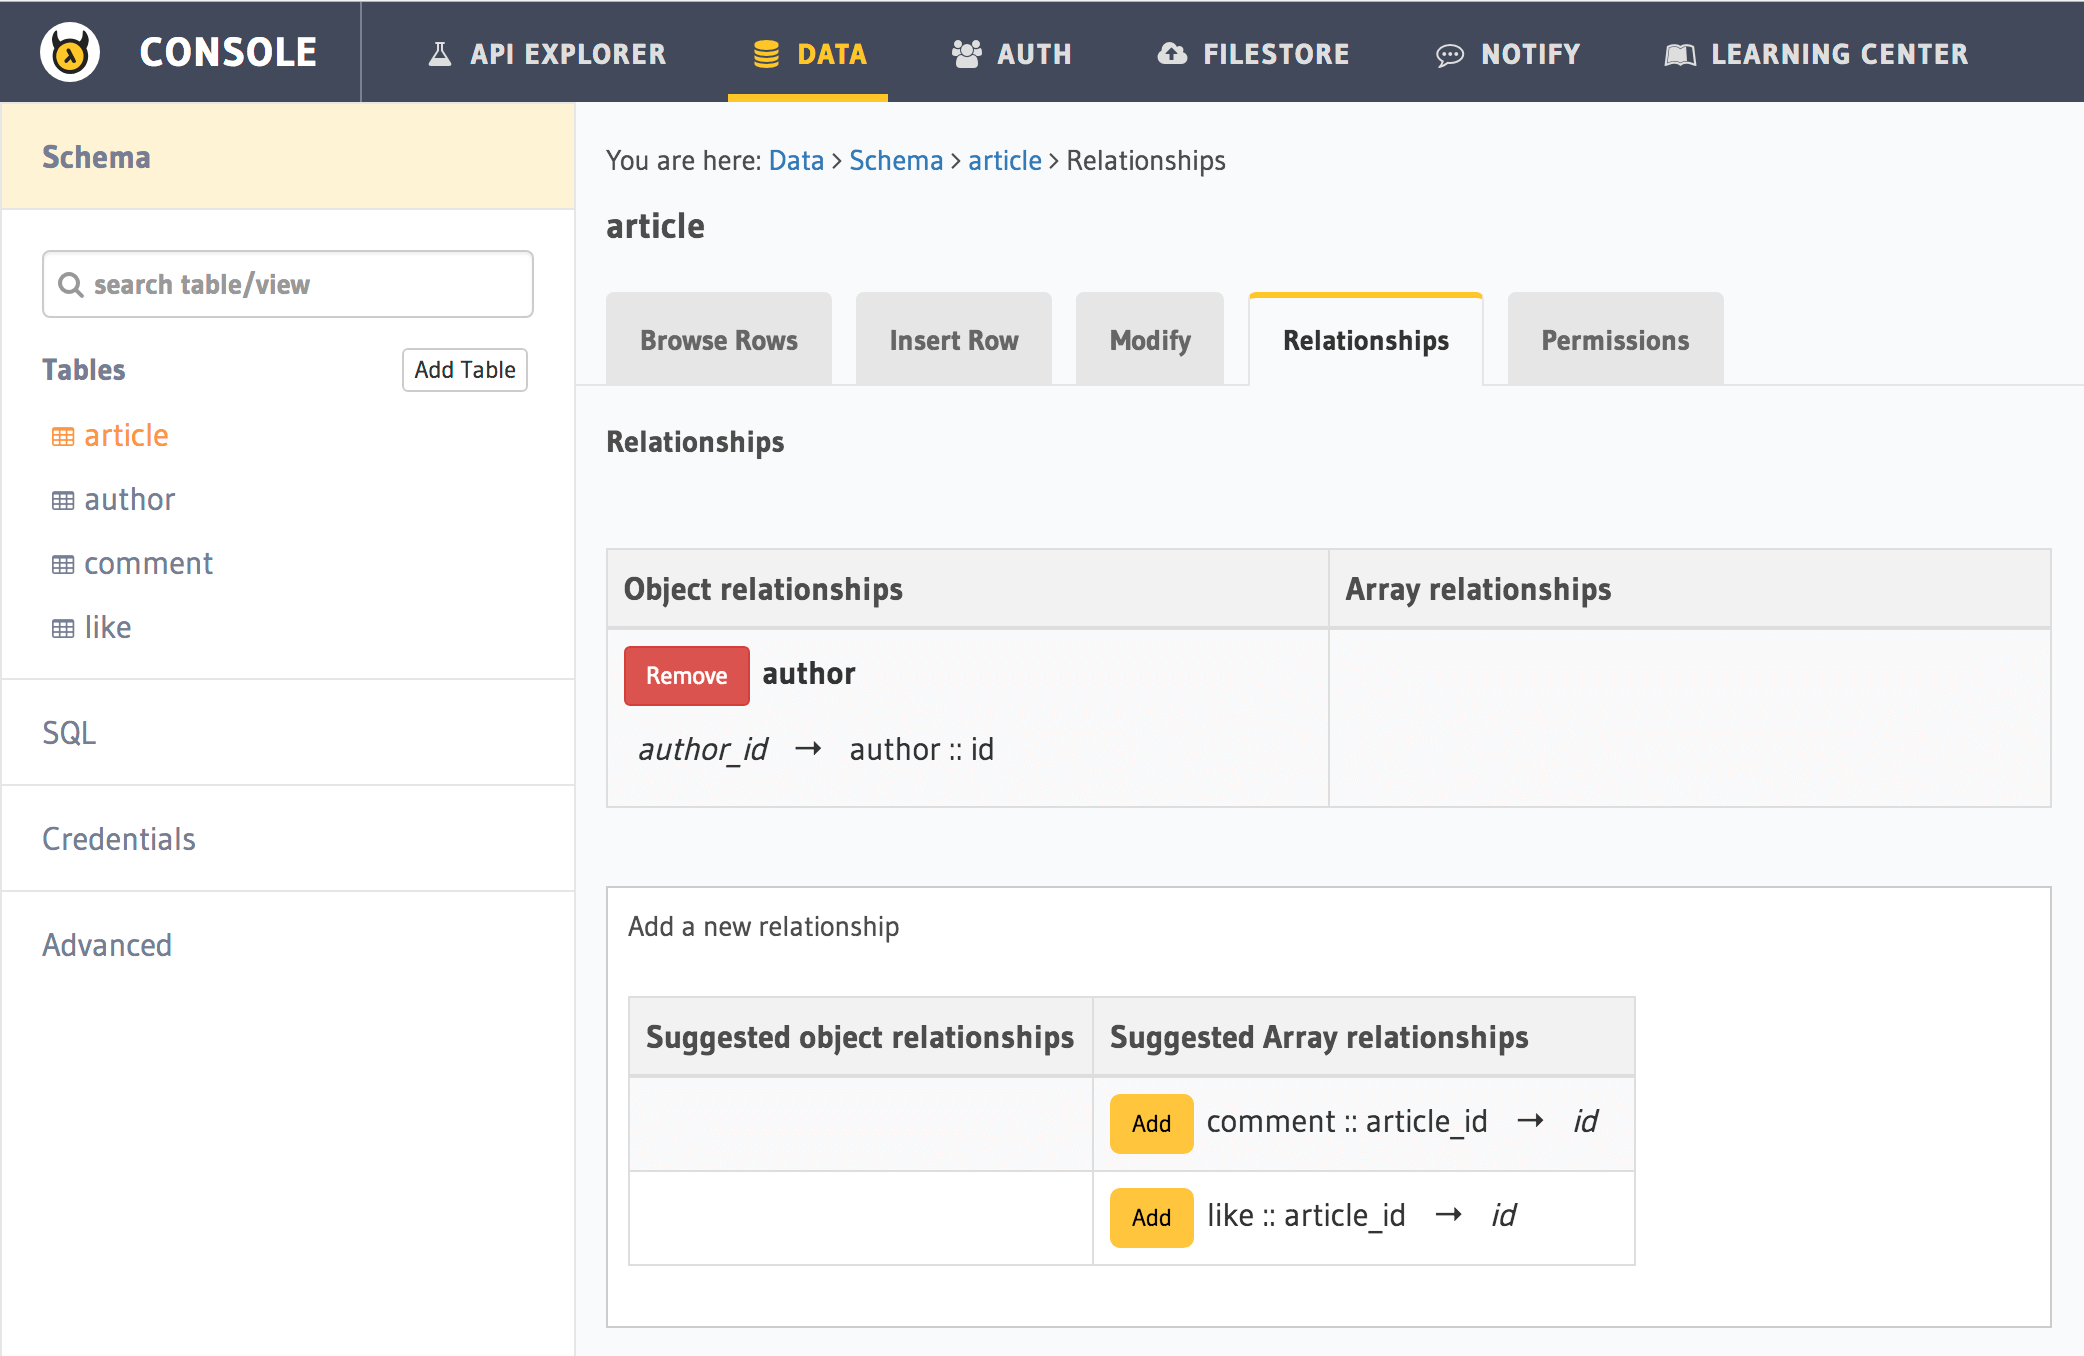
Let’s say you wish to add the array relationship comments for the article table.
You’ll see entries under suggested relationships, if you had added all the foreign key constraints that were mentioned
in the previous part. Click on Add to add a new array relationship and name the relationship comments:
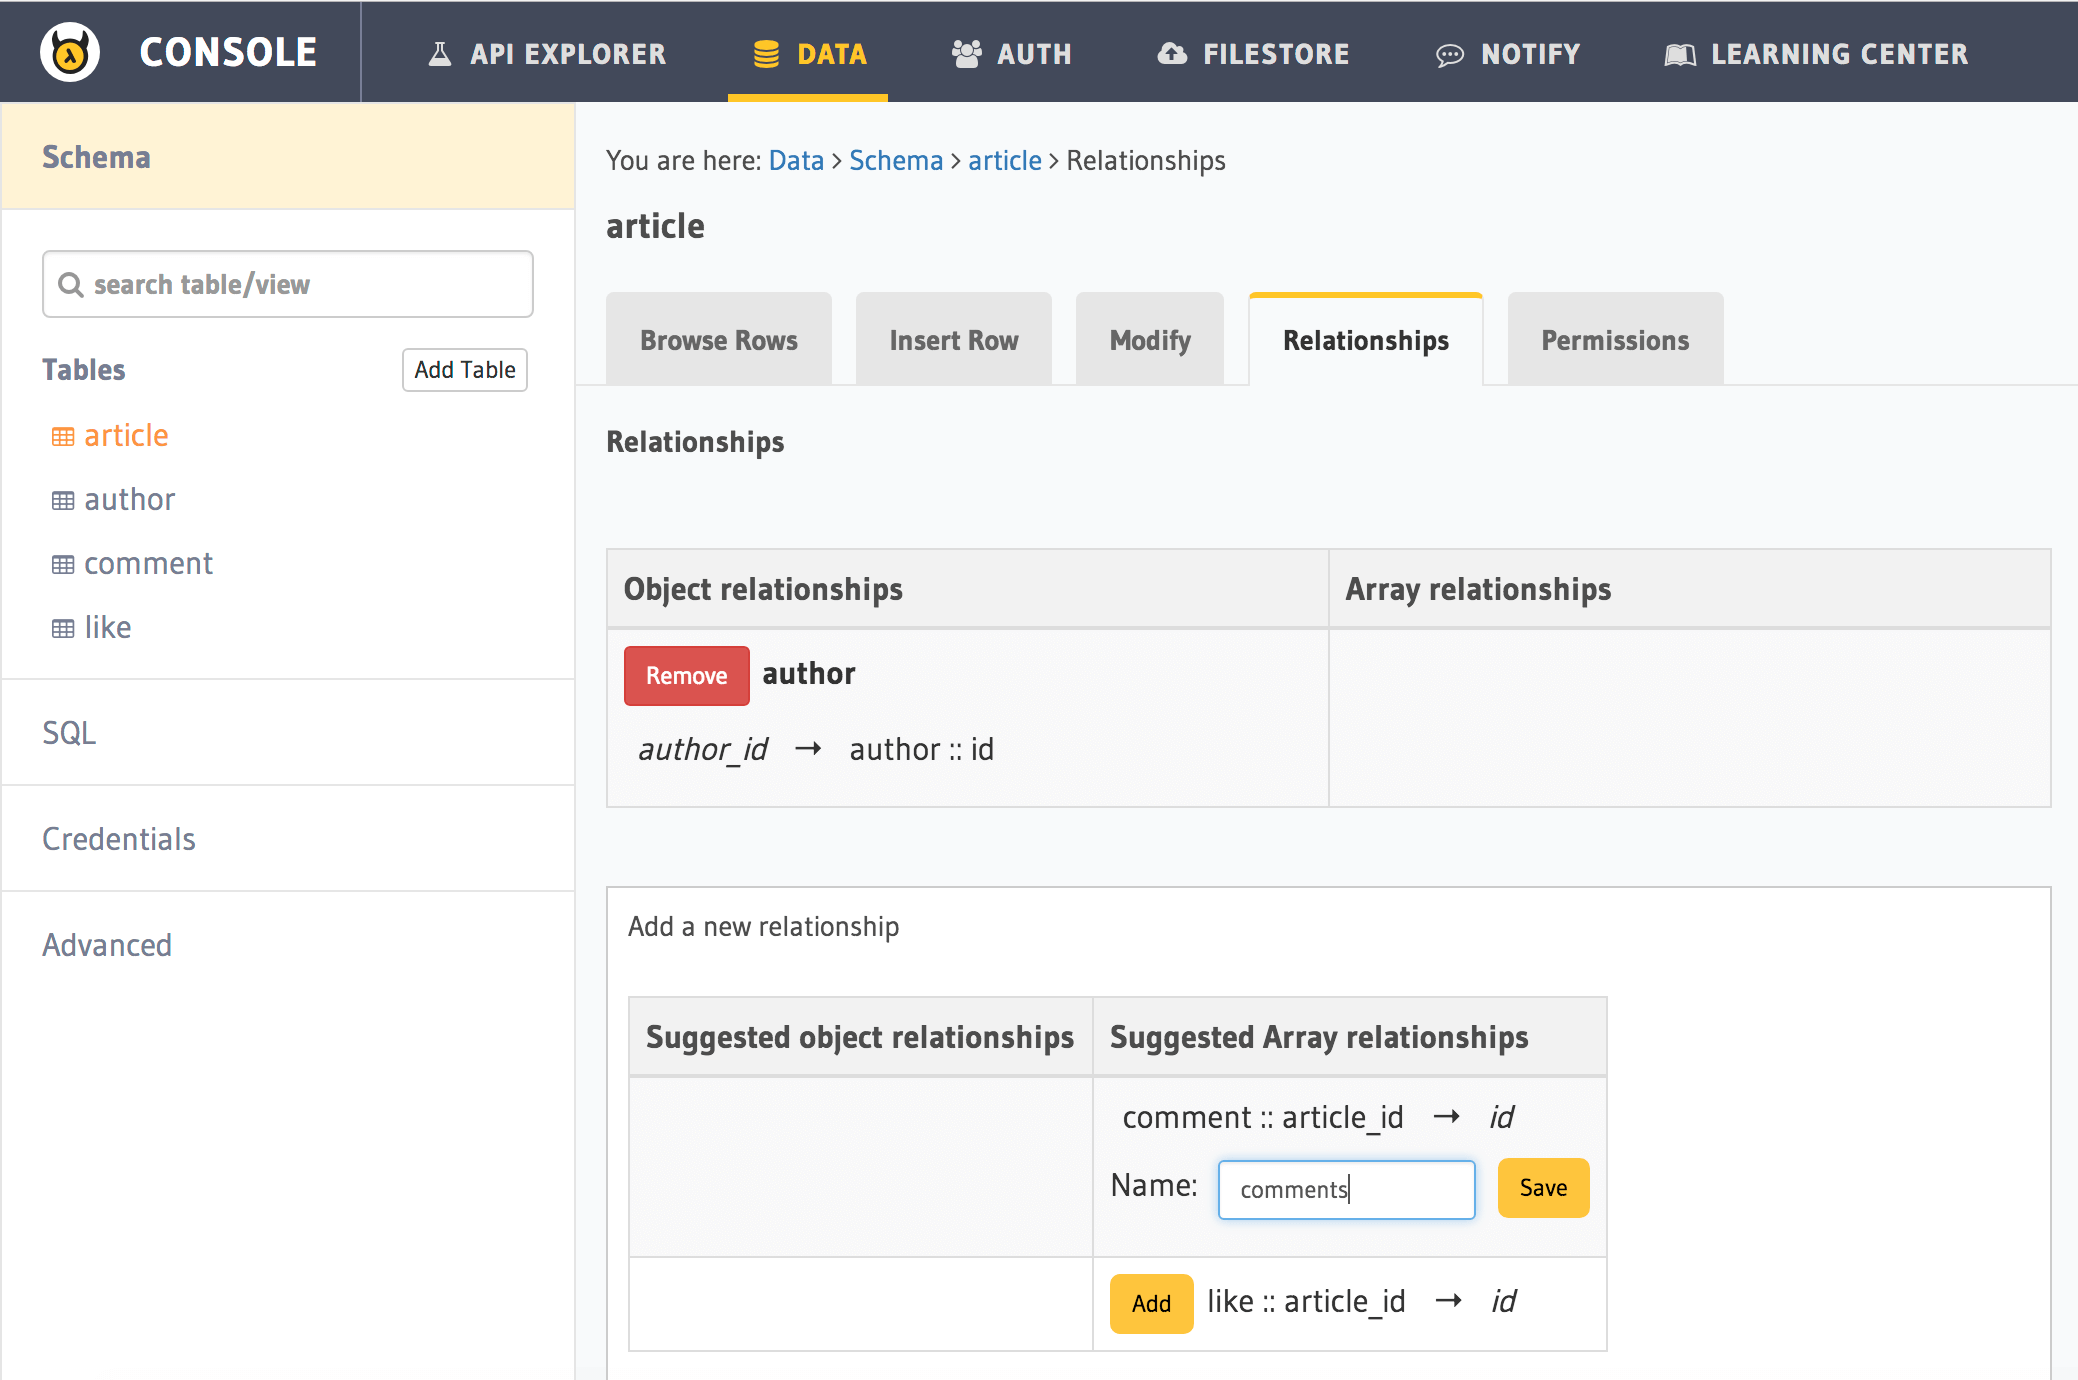
The relationship is created:
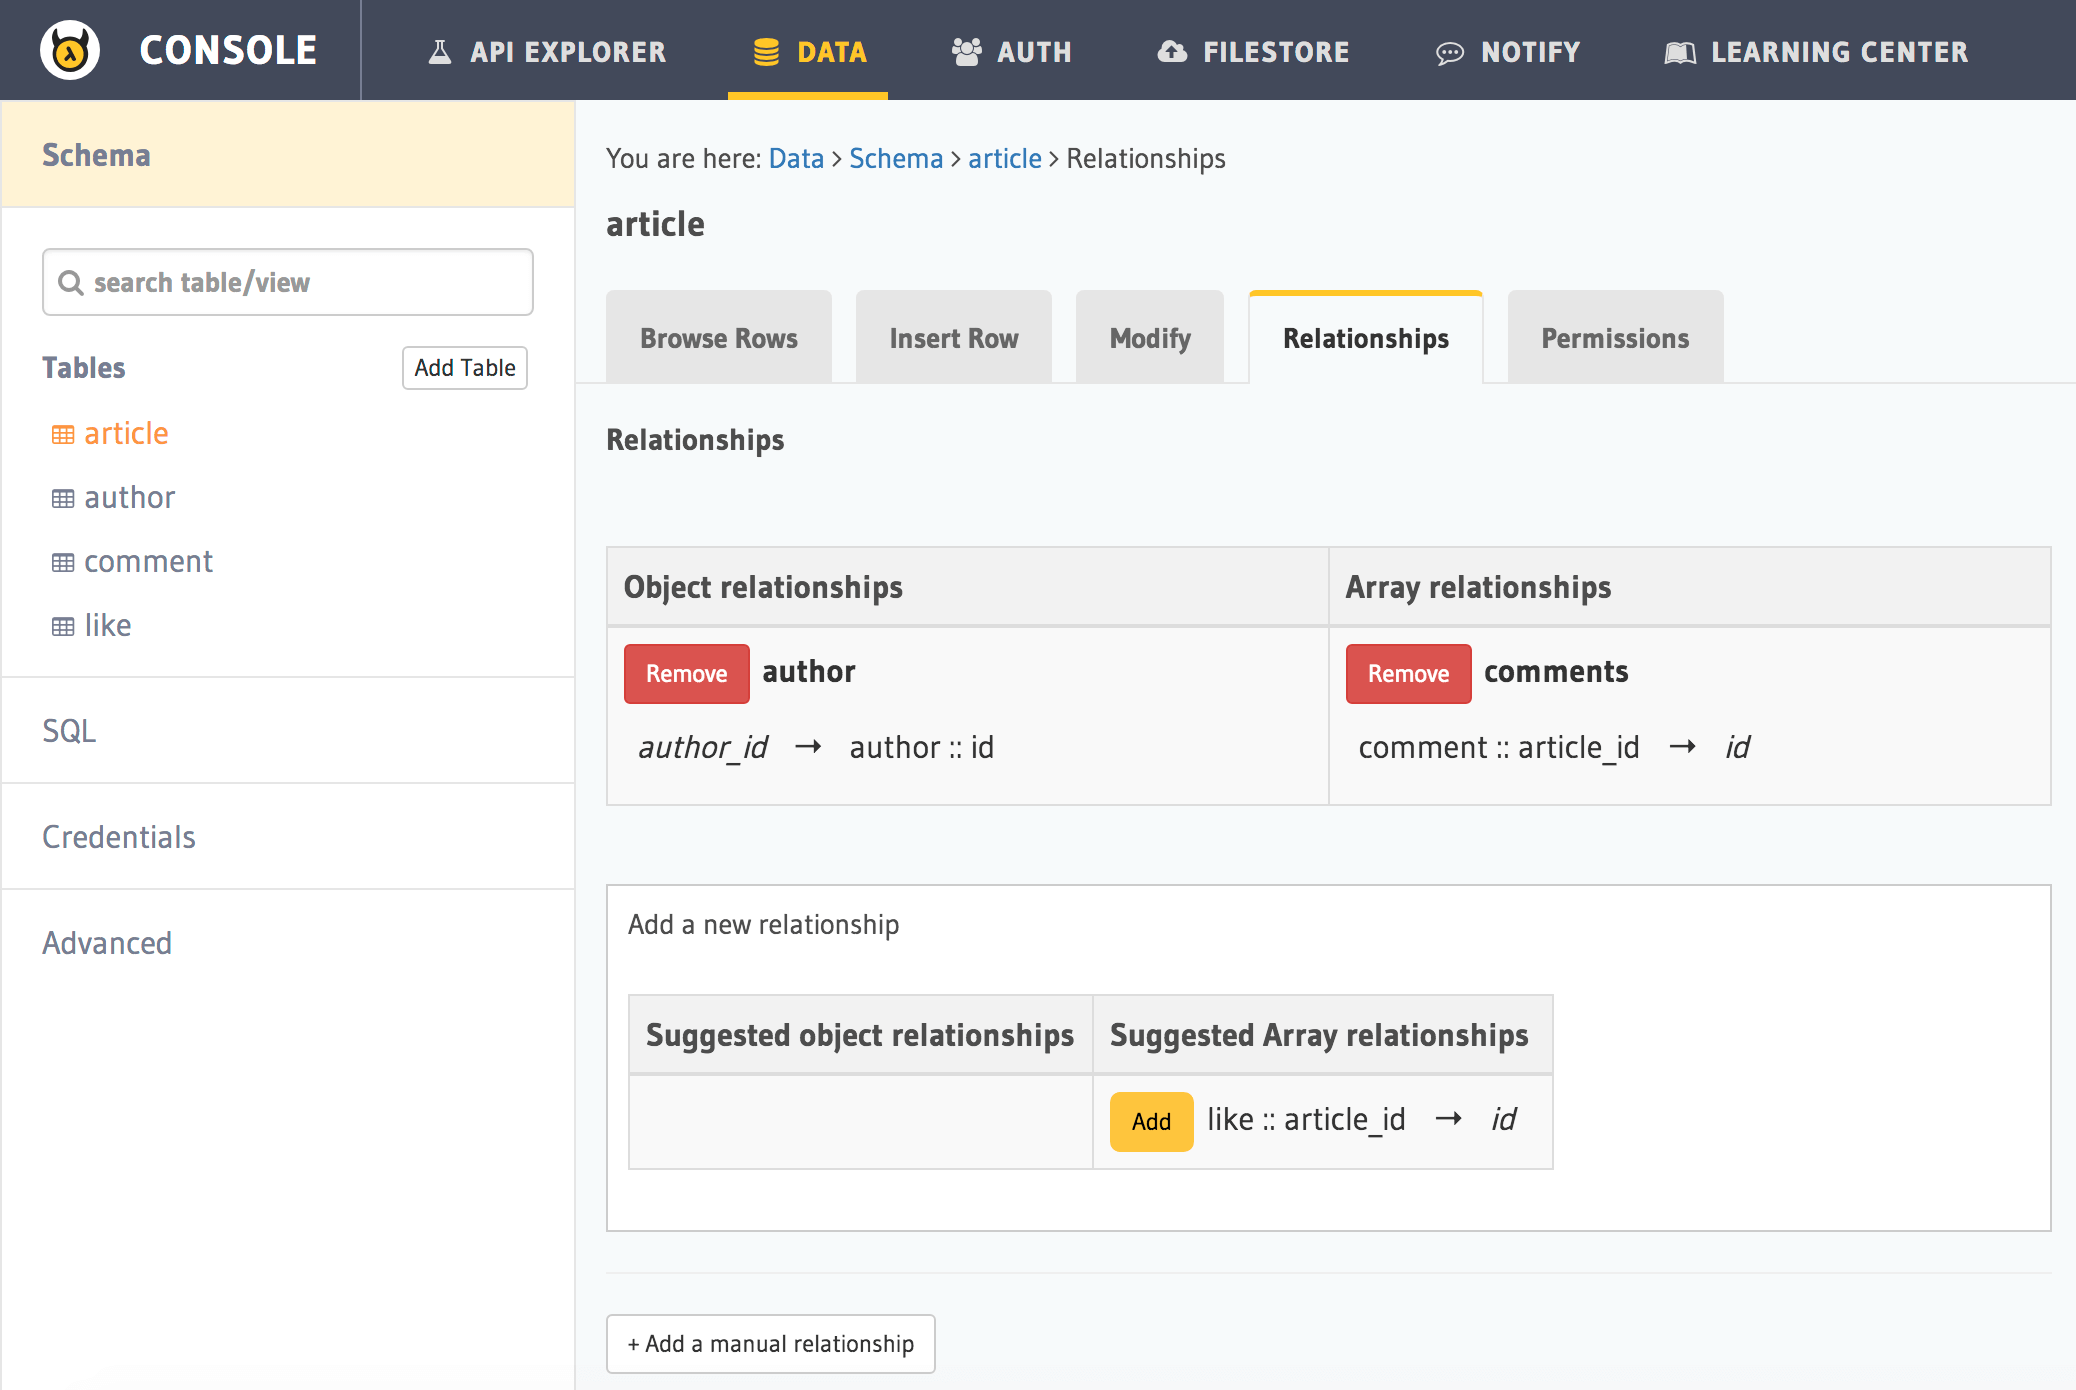
You can create the other relationships similarly.
Queries using relationships
To obtain the author’s name from the article table, we can write the following query:
query fetch_article {
   article {
     title
     author {
      name
     }
   }
}
The same syntax can be used to obtain the titles of all articles across all authors.
query fetch_author {
   author {
     name
     articles {
      title
     }
   }
}
You can use relationships inside where clauses. For example, if we wish to only fetch articles having a rating
of 5 by the author with the name Warren, we could use:
query fetch_article {
   article (where: {rating: {_eq: 5} author: {name: {_eq: "Warren"}}} ) {
     id
     title
   }
}
Let’s fetch authors who have not written an article with a rating that is lower than 3:
query fetch_author {
   author (where: {_not: {articles: {rating: {_lte: 3}}}} ) {
     name
   }
}
As you probably guessed, relationships can be nested. Let’s get all authors, with their articles, with their comments.
query fetch_article {
   author {
     name
     articles {
       title
       comments {
         comment
       }
     }
   }
}
We can also use where, limit, offset inside array relationships. Let’s say we want to fetch all authors and only their articles having a rating that is higher than 2:
query fetch_author {
   author {
     name
     articles (where: {rating: {_gte: 2}}) {
      title
     }
   }
}
Next: Add permissions and access control
Next, head to Part V: Access control.
